Wednesday 20 August 2014

IndigoBlu- Christmas in July Challenge (Photos and instructions on how to make one yourself)!

Hello and Good Day Everyone!

I really love using IndigoBlu products and have decided it was time to take part in their monthly challenges!
So............., here is what I decided to make for the "Christmas in July" challenge!


Items you will need to make one yourself!
Wooden Heart
White Gesso
IndigoBlu English Cottage Acrylic Paint-(postbox red, grandma's teacup, park lane)!
Large flat head paintbrush, small head paintbrush
Stamp Sets
Green Ink pads!  I used Green StaZon,  Stampin Up Old Olive & coloured the veins in with Gumball Green marker pen
Black StaZon
Scissors
Pinflair glue gel
White Card
Clear Acetate
Crystal Effects
Ball Tool and Soft Mat
FlitterGlu & Scoochy Sponge
Mega-Flake -Sheffield steel
Ribbon, Pearls & Red Gems

What to do
Always prime your wooden item first using the white gesso.
Paint the front, back and sides! Leave to dry!


Paint the item in the shades of paints you have chosen! I roughly painted my heart in grandma's teacup, then filled in the gaps with park lane.


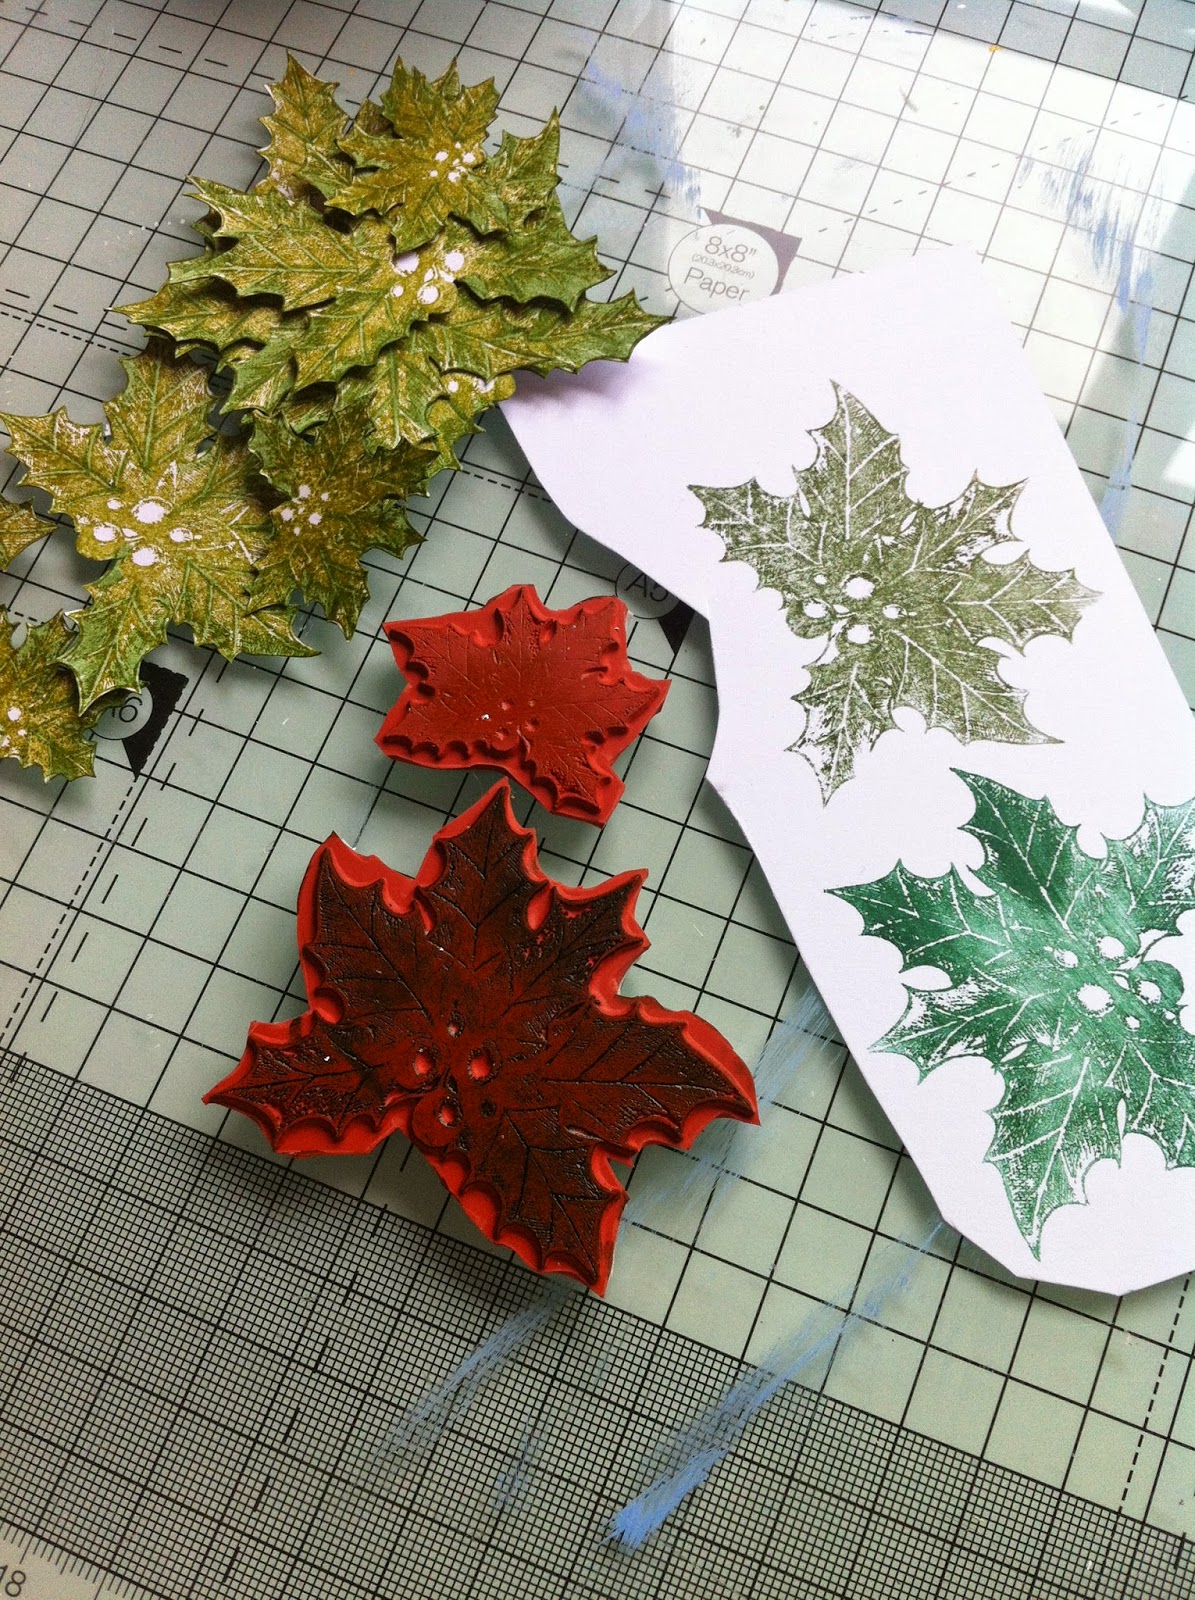
Stamp out 7 large Holly Leaves and 3 small leaves from the stamp set "Retro Christmas" with the green ink pads!
Colour in the white areas with the marker pens!
Cut out the Holly Leaves!

With the ball tool and Mat gently press and roll the ball tool over the leaves and mistletoe to give them a curved shape!


 Paint crystal effects over the leaves and mistletoe to give them a shiny finish!

 Once the crystal effects is dry add the red gems to the holly leaves and the pearls to the mistletoe!


Spread some FlitterGlu onto a piece of sponge and use the sponge as an "Ink pad" to cover the stamp with the flitterGlu! Stamp your image several times on your wooden item!
(stamp set used "Here comes Santa")


Once you have added your glue, cover the images with the Mega-Flakes!
Gently rub all over the image and let the flakes cover the glue! Check all areas are covered! Rub off any flakes that are not needed!
Use the Schoochy sponge to take off any more of the flake and to help show up the image!
 With Black StaZon ink, stamp out the Christmas sentiment from the stamp set "Retro Christmas" onto a piece of acetate and cut out! (I used a spellbinders die to do this)! 
Turn the acetate piece over and paint the letters in postbox red using a small paintbrush!
Colour the leaves in with a green permanent marker!

Make up a small Red bow out of ribbon and thread another piece through the hold at the top of the heart as a hanger!


Glue the Mistletoe in place over the ribbon where it was threaded through the hole!
Glue the bow on top of the Mistletoe!
Stamp, colour and cut out a Robin from the "Retro Christmas" stamp set!

Glue the Holly leaves down one side of the heart then attach the acetate Christmas sentiment over the bottom part of the heart making it "Dome" a little! See photo below!
Glue two small holly leaves onto the acetate as well!


 The Finished Item!

I really hope you like this project and give it a try for yourself!

Happy Crafting xx


Sunday 17 August 2014

Altered Cotton Purse

Good Afternoon Everyone,
Here is a project I have been working on and when I shared some photos on Facebook I receive quite a number of comments so thought I would share with you how to create a purse of your own!
Front View

Back View


Altered Purse
Materials and Equipment Needed
·         Cotton Purse
·         White Gesso  
·         2 Paintbrush’s 1 x thick brush / Flat head size 1"
                                     1 x thin brush for use in softening the coloured in images
·         Glue and Seal
·         StaZon Ink
·         Stamps
·         Derwent Pencils
·         Paint Brush & Water
·         Ribbon, Buttons, Thread, extra Cotton Material
·         Piece of card the size of the case you are altering!
·         Iron & Paper

What to do next!
If you have a spare piece of cotton material, paint it with gesso a couple of times and you can use this as a practice piece to stamp on before you start stamping on your purse!
Make sure the purse you are altering is smooth before painting! If it has creases in it, give it an iron to smooth it out! The reason for this, is to have a flat surface to stamp on!
OK, ready to start!

(If you want to, cut a piece of paper the same size and shape of your purse, then design a layout of where you want your stamped images to go).

Onto the Purse

·         Place the piece of card inside the purse before you start painting! This stops the paint going through and sticking the purse together.

·         Paint one side of the purse and let it dry. Turn the purse over and paint the other side! Paint both sides again!
(This helps to make the surface of the cotton flatter to get a better stamped image)!

·         Once the purse is completely dry you can start stamping!
Just remember you won’t get a crisp image if you try and stamp too close to the edge of the purse where the hems are, as it is double material!

·         Use StaZon ink to stamp your images as this ink is permanent! Give the ink time to dry completely! About 10 mins!

·         Use the pencils to add colour to your stamped images. (You can soften the colours a little by using a damp not wet paintbrush to go over the colours! (Clean the brush between colour changes)!

·         When you have finished stamping and colouring leave the purse to dry over night!

·         Iron the purse with a dry medium heat iron, (no steam) between a piece of clean white paper (This stops the images from being transferred to your ironing board)!

·         Let the purse cool then paint a layer of Glue and Seal on both sides! Leave to dry for a good 4/6 hours! Better if you can leave overnight!

·         Decide what type of embellishments you want to sew onto the purse! Sewing on ribbon, beads, buttons etc!

·         On the Purse I posted on Facebook, I used the practice material to stamp and colour the same butterfly I stamped on the purse to make a 3D image on the purse!

                                              Pearl Flat buttons sewn on with brown cotton
Butterfly stamped and coloured on cotton material then cut out to form a 3D element to the Purse


Good Luck and Happy Crafting!

Sunday 10 August 2014

By the seaside, besides the sea!

Hello Everyone.
Today I have something a little different for you to look at! 
I have carried on with the theme of shoes and this time I have created them from Graphic 45 papers, By the Sea!

I really love these papers and am very loathed to cut into them, but thought it time to do something with them instead of being in my paper box!


I cut out the shoes with the Ballroom Sizzix die using a piece of Graphic 45 paper along with a piece of blue pearl card! I then found the images of the shells and the boys face from another piece of the G45 papers and them out and glued them into place using Pinflare glue gel to give them some dimension! I then had a rummage through my embellishments and found some silver charms in the shape of a ships wheel an anchor and a fish and attached them to the shoes using bakers twine! To finish off I used some small stick on pearls!

I then went on to make another pair of shoes with the smaller front to them and decided to alter a large peg to use as a stand for the shoes!

This time I decorated the front of the shoes with lace ribbons which I put little pleats into and added a couple of buttons! Ribbon was also added to the back of the shoes! Again I cut out an image of a ships wheel and I attached a small silver anchor.


I purchased a large decorated peg a little while ago and decided to alter it  first by sanding down the peg then painting it with white gesso! Once dry I covered the front and back of the peg with G45 paper! I then used a light blue ink to finish off the peg covering the white parts and the edges of the added paper! A strip of cream hessian was ruffled and then glued onto the peg.
Images of the mermaid and shells were cut out and glued in place!

I hope this will give you some ideas to play with.
Happy Crafting,
Sue x


Thursday 7 August 2014

''These Shoes Were Made For Walking...''

The Ruby Slippers seemed like such a hit that I've got some more to show you today! 

These are made out of Sizzix Die cuts (each shoe is 6'' long and 2.5" wide at the widest part) and can then be glammed up using diamonds, bows, brads or flowers. [see below]

I have had quite a few requests for the Die cuts so I have now put them in my shop. 

There are three pairs of die cuts per pack, with full instructions, and a video to follow! 

(At the moment, there are a packs of red, black and white but you can email me with your colour choice.)

Happy Crafting! 


Monday 4 August 2014

There's No Place Like Home! Ruby Slippers


Check out these Shoes!

I Created these for a Challenge I joined on Facebook, to use the colour Ruby.
The shoes and stand are cut from a Sizzix Dies, and the flourish was cut from a Tonic die!
The shoes were cut from red card stock then once assembled I painted them with glue and dusted them with glitter. (I have also used red glitter paper but this makes it more difficult to glue the pieces together)!
The stand was made from thick card covered with patterned paper before I cut it out with the die


I cut out a larger size platform for the shoes to sit on then decorated the top with green card stock and yellow patterned paper, then I drew on cobble stones to represent the Yellow Brick Road! The edge of the road was highlighted with gold stick on gems and around the platform I glued on pleated green ribbon.
The tiny flowers were punched out of card stock then I used a ball tool to make them slightly 3D and added a gem to the middle!
I cut out four flourishes and placed them around the stand and the side of the shoes!
The tiny flowers were punched out of card stock then I used a ball tool to make them slightly 3D and added a gem to the middle!
I cut out four flourishes and placed them around the stand and to the side of the shoes!

Thanks for reading this post, if you would like more information or to purchase die cuts please email me!
Have you made one yourself?  why not share your photos here!xx

Friday 1 August 2014

Giveaway

Good Morning Everyone,
We have a "Winner"

Well done to Chris Holland!

Chris, I hope you are reading this! Please send me an email with your address details so that I can send you the kit.
birdcagecraftstudio@hotmail.co.uk 


Posted by Chris Holland Fri, July 25, 2014 11:25AM
Hi Sue, Have watched the video its absolutely gorgeous, you have certainly given me inspiration. I would love to have this and give it a go, thank you
Thank you to Everyone else who left me a comment! Sorry I can't send you all one, but check back as I will be doing more giveaways! XX

Lotus Flower using Origami

Good Evening fellow crafters!
I have a quick photo tutorial to show you on how to make an Origami Lotus Flower!

Luke, a friend of my son showed me how to make it and I have taken photos at each step!

As he was making it, I had a "light bulb"moment!
This would make a brilliant coaster for my icy drink I thought! (Has anyone else ever done this? I don't believe I am the first person to think of it)!

Anyway, here is how to make it and what you need:-
One Napkin
Flat Surface
Drinking Glass

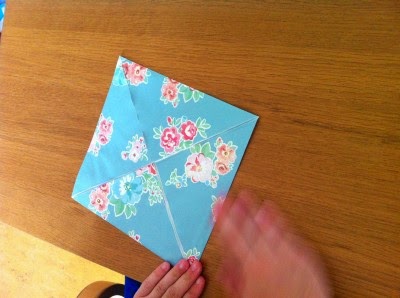
Take one Napkin and open it up flat on the table!
*Fold each corner into the middle of the square


*Once all four corners are folded do the same thing again!


*Do the same thing again for a 3rd time!


*Turn the napkin over and fold all four corners into the middle again!


*Now, place the folded napkin onto an up turned glass.


*Gently pull each petal down, keep going around all four corners, and all levels!


Once you have pulled down all the petals, turn the flower over a nd place your glass into the middle.
No more water drips when you have cold icy drinks!


Chalk Marker Kit "Giveaway"

Hello Everyone,
I have just finished filming a Video on how I created the "White Peacock" over on YouTube and decided I would also run a "Giveaway" of four stamped images of the Peacock (Perfect Peacock by Stampin up), two on black card embossed in white, one black StazOne image ( for use with marker pens) stamped on white card and one black Memento image (for use with alcohol pens) stamped on white card! There is also a Stampin up Chalk Marker and 40 tiny Stampin up pearls!

To win this set please leave me a comment, here or on my Facebook page!
This Giveaway ends on Sunday 27th July at 12:pm. ("GIVEAWAY NOW CLOSED")!Rules
No purchase necessary
This Giveaway has been organised by myself and has nothing to do with Stampin up! 
As I am new to all this, I will be drawing a random name off the list of people leaving comments! If you are happy to, please leave your email address with your comment! 
Check back on this site on Monday 28th to see who has won! 
If your name has been drawn please email me at birdcagecraftstudiohotmail.co.uk if you did not leave me your email address so I can get postal details from you to send this giveaway out!
If I don't hear back from the winner within 24 hours I will draw another name out!
The Giveaway will be sent out by Thursday 31st July!
Good Luck.

You can also find Lots more crafts ideas on my Birdcage FaceBook page!

Here is one more Stamped Peacock image Embossed in Gold and Coloured in with Stampin Write Markers in different shades of pink!


Perfect Peacock

Good Evening Crafters!

As we are having such hot weather here in Gloucestershire, I decided to stay in the cool of my craft studio today and have some time playing with the new stamp I purchased from Stampin up!

I really adore Peacocks for their beautiful colours!

To have the time to experimented with a couple of different techniques is great fun!

Here I decided to over stamping the Peacock image with a another stamp set called Work of Art as a way of adding colour!


As you can see I tried using stazOn first but I wasn't very happy with the image so I then tried embossing in black and I was much happier with the look of the image!

After doing these I then went on to stamping the image again and colouring it in with "Peacock" colours using stampin' write markers! The flowers were stamped again on white cardstock coloured and cut out then glued over the ones on the image to give them a 3D look!