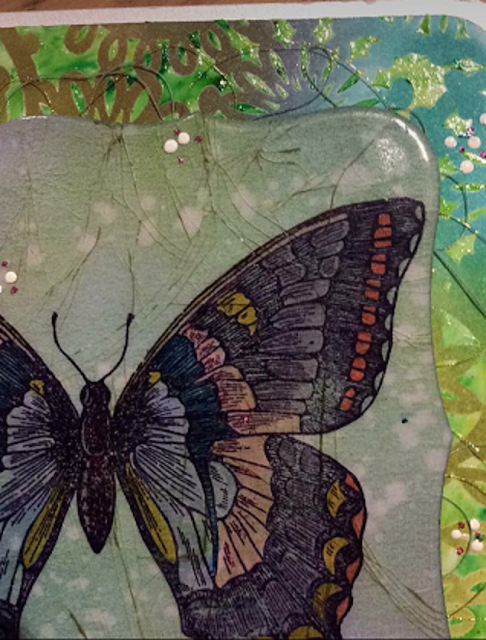
Hello there, well its been a few weeks since my last post but its not because I have lost my crafting mojo but because Martin and I are celebrating his 60th Birthday with a bit of traveling. (more about that in a later post). For today I wanted to share with you this months Card Swap Challenge.
So this time the challenge was to make a card front using the 'Cracked Glass Technique'.
I must say thank you to Louise (my swap partner) for taking these photos for me.
Here is the beautiful card I received from my swap Partner Laura. Such a beautiful card
Thank you once again Laura
Below is a description of how I put my card together
This technique is done by heating up several layers of clear embossing powder over your chosen stamped image, popping it into the freezer for a couple of minutes and then gently bending the piece until the embossing cracks. If you want to give the piece a more vintage look or just to highlight the cracks then you can go over them with a coloured ink, then wipe it over with a cloth so the ink just stays in the cracks.
I love using this technique but I know a few people in the group had a few problems. My suggestions were to use a 250 gsm or above good quality card stock because some card absorbs the moisture that comes out of embossing powder when heated, it liquefies and the card can suck it in.
I also used two coats of UTEE first then put three layers of Stampin Up clear embossing powder over to give the piece a smoother finish. A couple of people from the group thought using ultra fine embossing powder was to light in texture to give good cracked finish for this technique. I hope this little hints can help you.
So once I had made the center piece for the card I pulled out another piece of white card stock and a couple of stencils and clear embossing paste to create another the backing for the card.
I first lay down one of the stencils and went over it with just a couple of colours of brown, green inks, the went on to use the other stencil with embossing paste. Once the embossing paste was dry I went in with a few different coloured inks, using a sponge to add the colour. Once I was done I went over the entire piece with a wet wipe to blend the colours together.
Just before I mounted the butterfly onto the card base I added curls of gold and green thread to the back of the piece.
Once this was attached to the card I then put little dots of white enamel paste around the card.
As you can see in the photo above one of the butterflies wings were cut off when I die cut it so that extra piece was used to decorate the inside of the card. I didn't do the crack glass technique on that piece though.
Thats all for today, please visit again soon.
Happy Crafting
Sue xx


